Saturday, June 30, 2012

Helping Shelter dogs (with a little help from my shelter dog)

http://www.pedigreefoundation.org/


Pedigree started a campaign a few weeks ago to help provide much needed food to shelters around the country.  For every blog post about the campaign, they will donate a bag of dog food to a shelter in need.

My beloved Sir Winston Piccolo came to me from a shelter, after his owner died and their family didn't want the responsibility of a dog. He was so terrified that he wouldn't come out from his corner and was about to be moved to the euthanize list when he was pulled by Tavia Meares of Middle Tennessee Corgi Rescue and brought to me in Kentucky.  Winston Then:


The first day we brought him home


 And Winston Now:

  Basking in the backyard


 Greeting visitors at our cabin on vacation


He's even enough of a mamma's boy to let me dress him up on occasion:
Being forced to dress as Aramis for halloween as part of the three Corgiteers
 (hey, his Sister had to dress as Porthos, while Dad was Athos)


Every dog deserves to be loved, cherished and occasionally mortified as Sir Winston has.

Sunday, June 24, 2012

Two day Steampunk

I thought I was going to have more time for this costume, but it turned out quite well despite my crazy week:

I didn't get a better picture because I was having too much fun to ask people to take my own picture!

The Skirt is made from 6 of my husband's worn out dress shirts which i cut into gores and sewed together. The shirt is a thrift store find that I've used before, and I cannot say how much I love this piece - great lace detailing, pin tucks and fun buttons - such a great find!   Though you can't see it, I'm also wearing a great ruffled petticoat that I made from a bed sheet. 

It's official, if I'm going to keep doing steampunk work, I need to invest in a ruffler foot for my new Pfaff machine because it takes waaay too much time to do all that gathering by hand.

I am of course wearing my fabulous tailor's cuff from R.H. Mardigan, since no travelling seamstress should be without her tools and my wonderful goggles that my husband made for my following the tutorial on Epbot.com (http://www.epbot.com/2011/07/how-to-make-steampunk-goggles.html)

My corset, which you can't see very well is a version of a pattern I've used before, but because it was going to be so hot this weekend, I adapted it to make it lighter in weight and a looser fit than I might otherwise have gone for. The fabric for this came from a skirt that ended up just not fitting right despite its fabulous suede texture and some leftover shop fabric - too little to do much else with, but enough to make some panels out of.

I'm going to be putting together some more detailed shots of my various accessories, and a full body shot of the skirt to show how all the panels went together.

Stay tuned!

Tuesday, May 22, 2012

And now a brief break for Corgis

The 20th Anniversary of "A Grand Night for Singing" is in full swing and plays the second and third weeks of June.  I will be up to my eyebrows in thrift store finds and sparkly gowns.  To keep myself calm and to bring more cuteness into the world:
 I present Sir Winston Piccolo


Whose ears are actually longer than his legs ( I measured)

Who usually gets photobombed by Eva the Diva


And though he derps rarely, he derps exceptionally

Thursday, May 17, 2012

A Brief Guide to Wrapping a Kimono (part 2)

How to wrap the Obi:
In a traditional Kimono, the Obi fabric runs the entire length of the Obi, but for budgets and other purposes, our Obis for the female Kimono are about half decorative fabric and half muslin ties.  The process of tieing the Obi is the same for both the female and male kimono.

Here's how you get started:
Lay one end of the Obi over the wearer's shoulder.  Make sure the wearer has a good grip on this end.

Begin wrapping the Obi around the wearer until you run out of decorative fabric, which should be in the center of the back.  (You may need to do this a few times to figure out how to place your fabric).


  Take the end from the wearer and tie a knot with the two muslin ends


Check the Obi placement and adjust the fit if necessary.


Carefully tuck the remaining fabric evenly between the obi and the Kimono, working around the body.

What follows is one way to create the obi bow, without using an obi brick - suitable for townswomen and other non-geishas.


  Feed a twill tie through the loop on the back of the small square obi piece.

Tie this piece around the main obi using the corner ties, covering any visible muslin.


To secure the cover, tie the ends of the twill tie around the front of the wearer.  Tuck any remaining ends into the obi.

Fold the obi drape in half.


Feed the folded drape through the cover and fold attractively.


  For men- you will only need to tuck the ends of the obi belt neatly between the Obi and Kimono.


And you're ready!! 

Tuesday, May 15, 2012

A Brief Guide to Wrapping Kimono and Obi (part 1)

In 2005, University of Kentucky Opera Theatre presented Madama Butterfly with costumes designed by Robert Haven.  He designed the costumes with some modifications to accomodate budget and theatrical necessities, while on the surface retaining the look of the traditional Japanese Kimono.

Assisted by two of UK's fine undergraduate voice students - here is a two-part tutorial on how to wrap these Kimono. 

Part One:  The Kimono

You will need:
1 undershirt (for Geisha, your shirt should have two ties dangling from the back of the neck)
1 underskirt
1 outer Kimono
2-3 Twill ties.

For Men and Women -
Put on your tabi (spit toe socks) and zori (straw sandals)  You probably won't be able to reach down when we're done.

Wrap the underskirt around your waist, making sure to wrap LEFT over RIGHT*.
Put on the Undershirt, and take 1 twill tie, and tie it around your waist, making sure that the garment wraps LEFT over RIGHT.


For men and non-Geishas, you need only to wrap the twill tie around the front of the undershirt - this will help your kimono lie flat in the back.
Geishas should tie their twill tie around the entire garment because:

For Geishas only:  take the two attached ties and tie them around the waist tie, pulling the collar away from the neck
You want to have a fist size gap between the back of the collar and the neck

 Next, for men and women, put on the Kimono, making sure that the undershirt sleeves are tucked into the Kimono sleeves.
For Geishas - place a clothespin or other clip over collar and Kimono at the center back of the neck, to keep the Kimono from shifting.

For Women only (Including Geishas):  Get a buddy to help you, as you (the Kimono wearer) hold out the front of the Kimono and lift it until it is just above your feet.  Your buddy then lifts the back of the Kimono to the same height. 
Once the Kimono is lifted to the proper height, the Kimono wearer pulls the Kimono to the front, making sure it is wrapped LEFT over RIGHT while the buddy takes a twill tie and ties the Kimono at the waist, keeping the excess fabric above the twill tie.

    
 For Men: Wrap the Kimono LEFT over RIGHT and tie at the waist with a twill tie. Some adjustment for length is possible but it should not be more than a small tuck (1-2 inches).


Your Kimono is now ready for an Obi.

*Why is it so important to make sure the Kimono is always wrapped left over right?

Because the Kimono is only wrapped Right over Left for funerals - you do not want to be the walking dead.


Sunday, May 13, 2012

Steampunk Empire Symposium

Greetings all -
I return from the Steampunk Empire Symposium VICTORIOUS!!! Not only did I manage to create three amazing costumes from thrifted and re-purposed materials, but one of my outfits won Best Concept in the Symposium Fashion Show!!  (all photos credited to the amazingly talented Mikki Schaffner!)

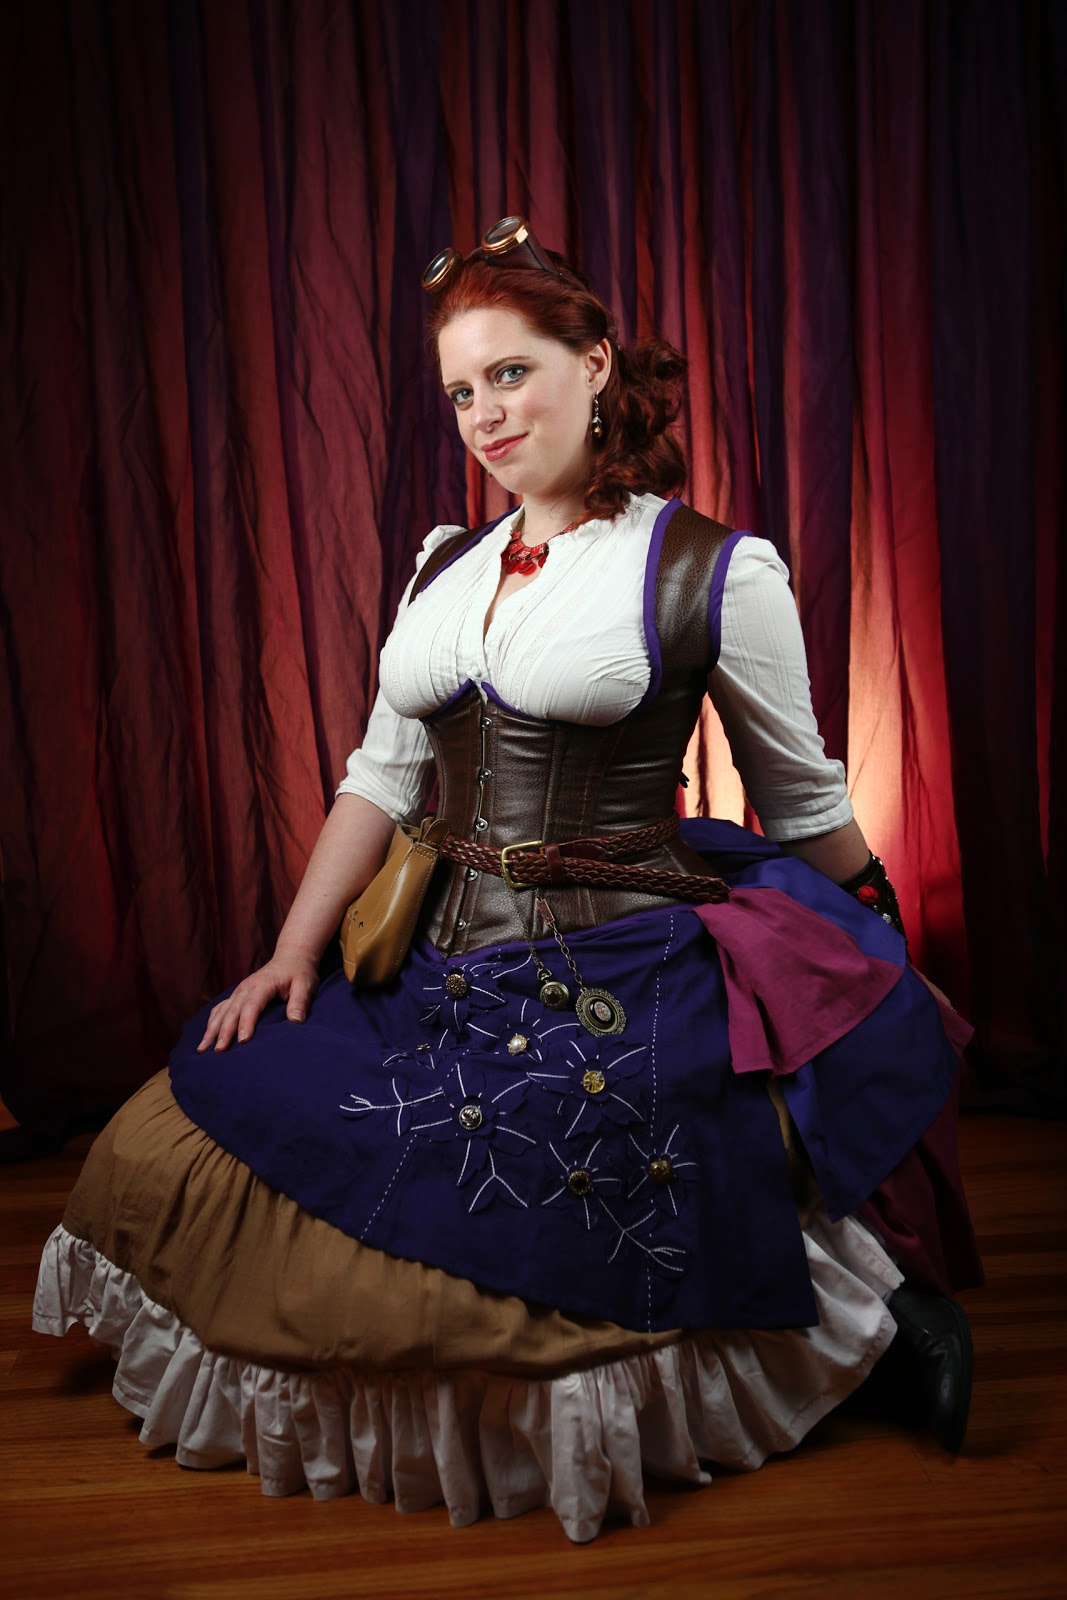
Here's the award winning outfit (OK, I won a sticker and a mustache on a stick, but STILL - I Won!)


Yes, that's the same skirt from my New Year's Outfit, and the belt pouch is the same too.  Time and resources allowed me to add a great faux leather corset, and a ruffle bustle made from the same bed sheet that gave me the skirt ruffle, plus some extra fabric I had that dyed to an almost perfectly matching purple. (the shirt was a thrift store find)

You can also see the goggles my husband made for our NYE adventure - I finally got straps on them, though I ended up just pinning them in my hair.
This was my Saturday outfit ;-)

Friday night, I wore the tweed suit and green corset that I wore to Steampunk Weekend at the KY Renfaire last summer, but I had remade the corset to fix some issues the first version had, and added a hoop skirt to help with the weight of the bottom ruffles (those things are HEAVY!)


Did I mention that I put this on in the parking lot?
Yes, for some reason I thought I would be able to lace myself into a corset, and put on a hoop skirt in my car with no one the wiser.  I was somewhat successful and since the jacket covered the back, no one knew that I'd missed four grommets on the back. The hoop ended up being put on actually IN the parking lot, since there just wasn't enough room in the car. 

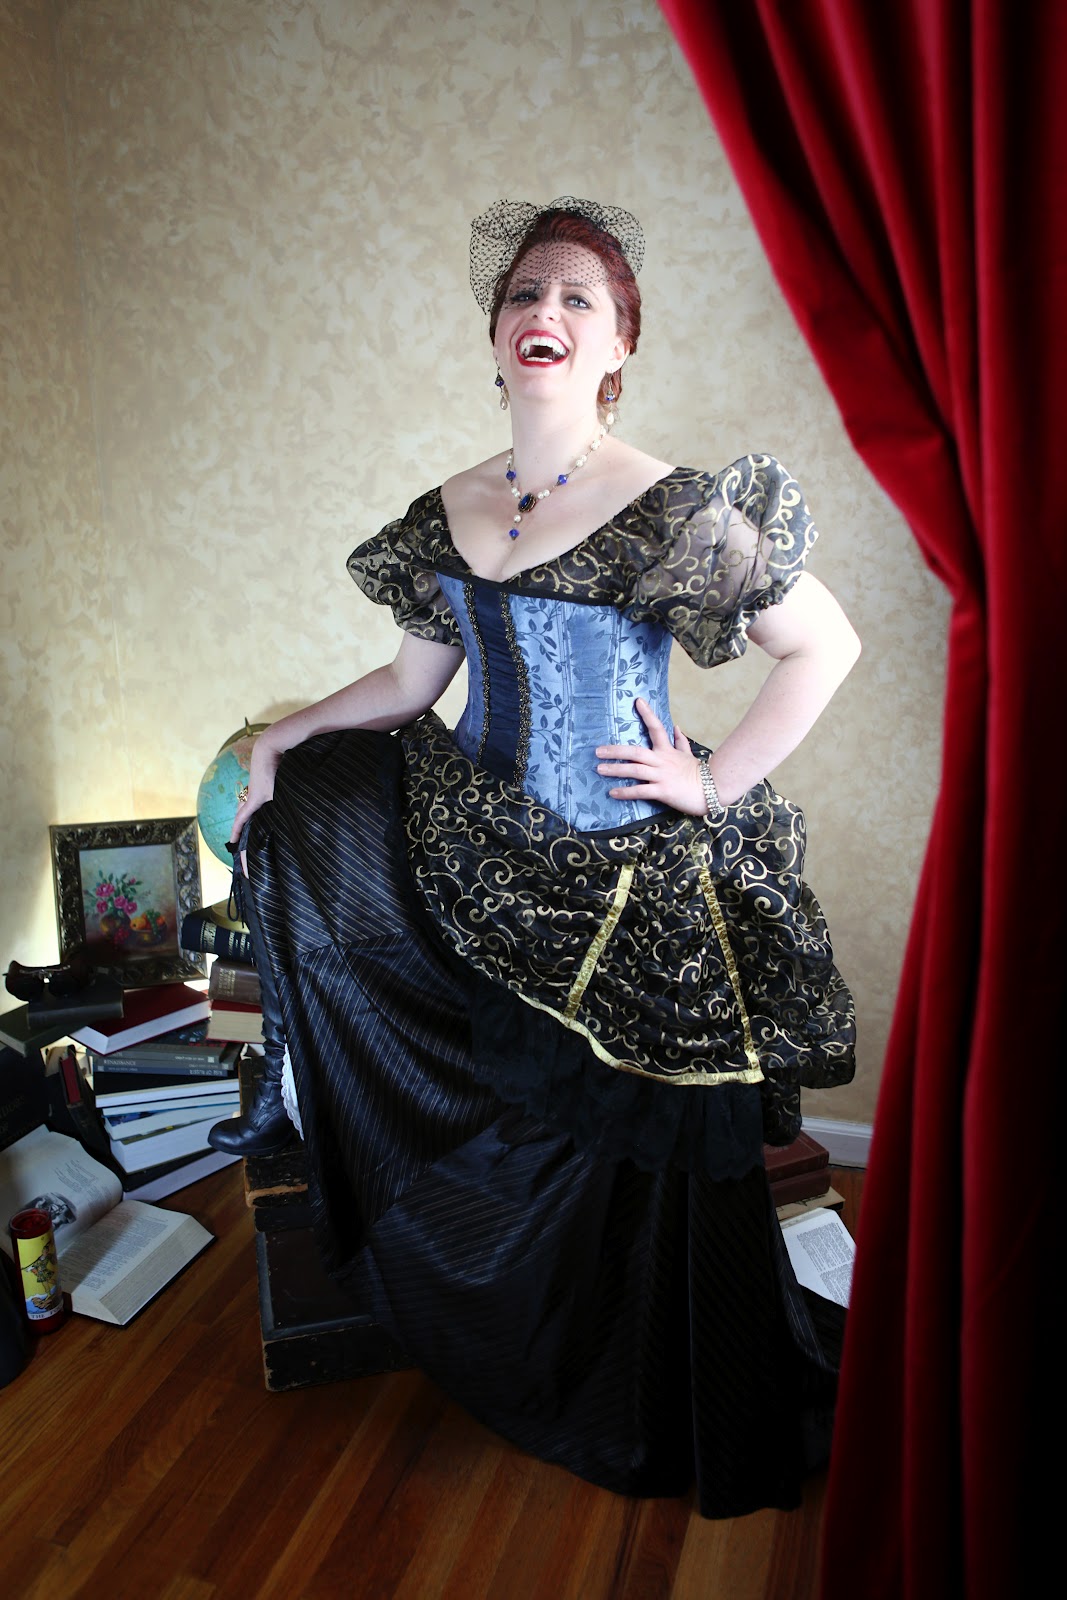
Saturday Night was the Masquerade Ball
I remade an old corset - took it apart, replaced the boning and added decent grommets and added sleeves and a bustle and apron made from fabric I found in the costume shop. It's from a rather infamous and horrible show in our past in which the costumes were literally SEWN ON TO PEOPLE AS THEY WERE GOING ON STAGE.  My boss was thrilled to get rid of it, since she couldn't use it without people referencing said horrible show.

Adjust one found skirt and Voila - instant ballgown:

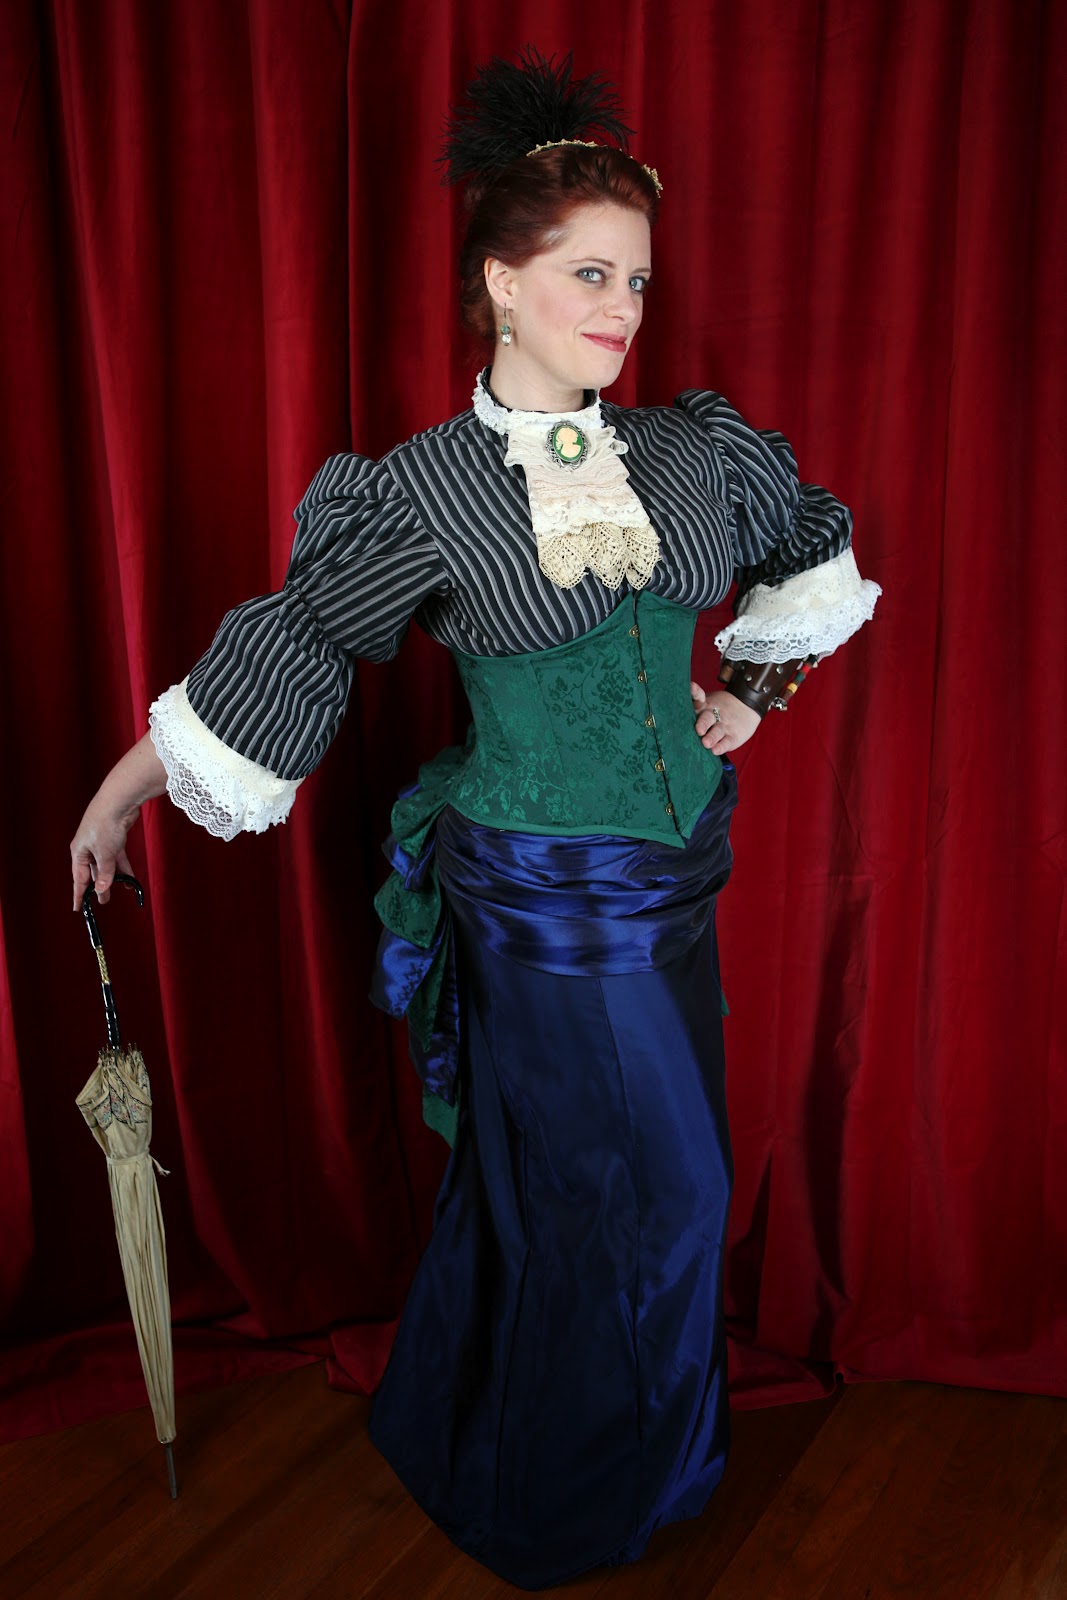
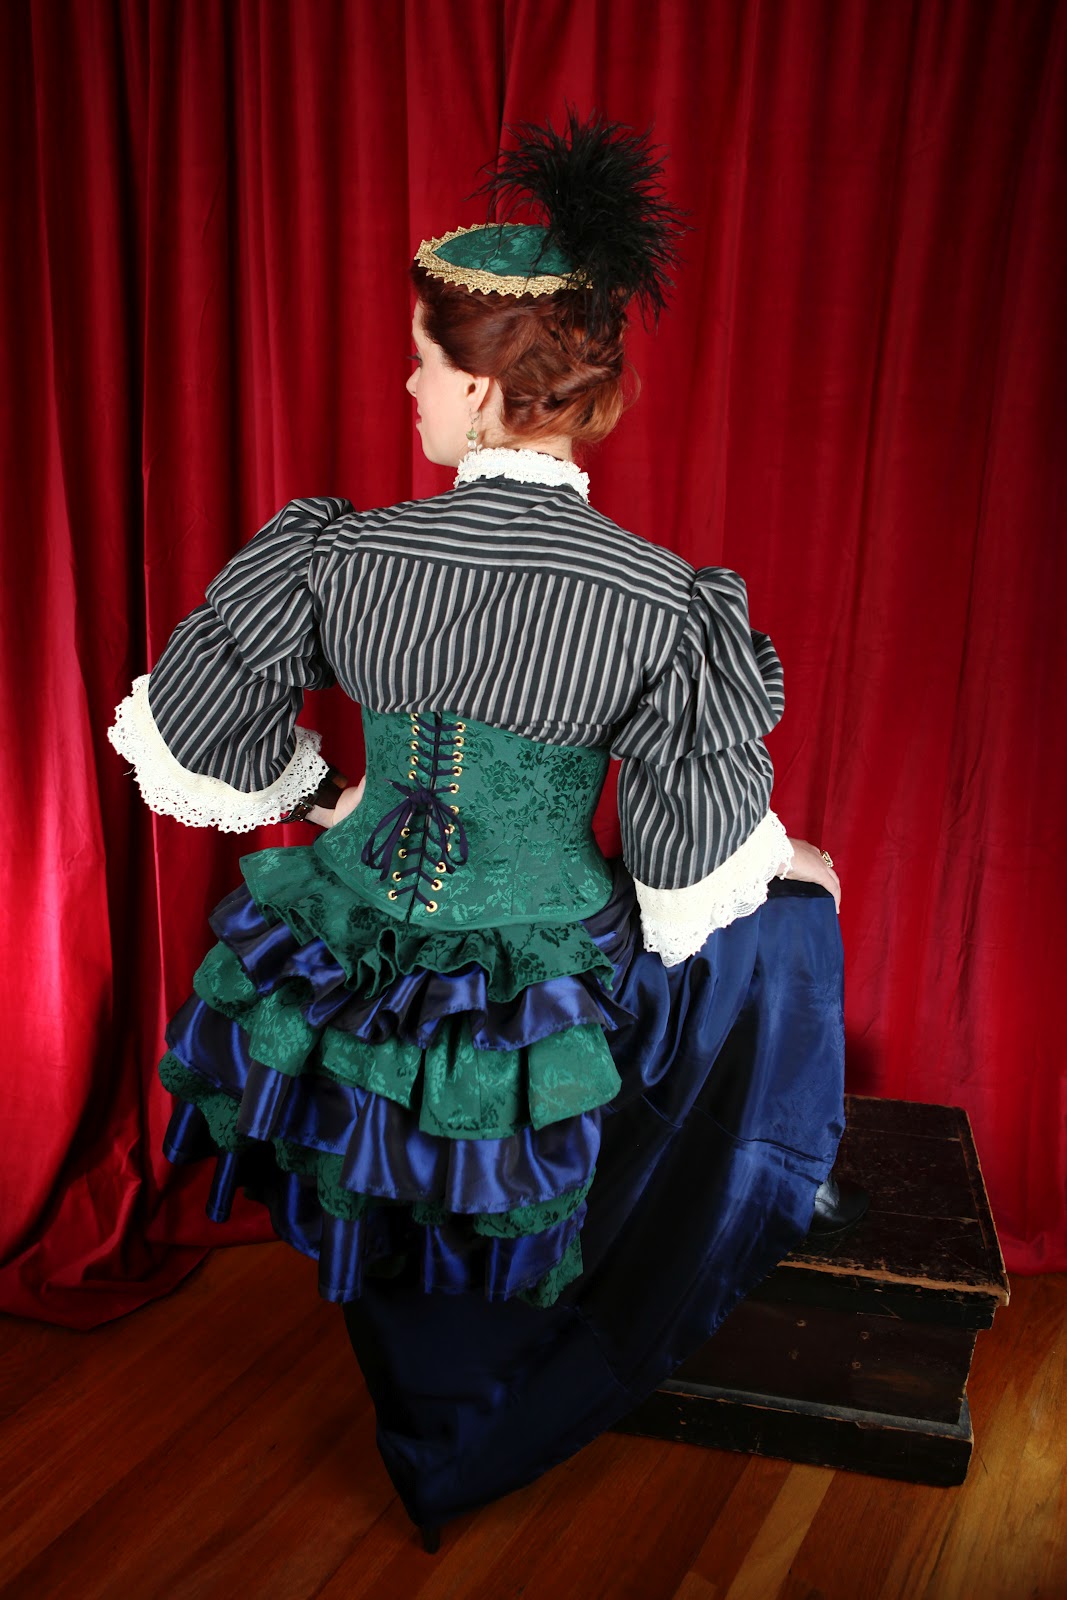
For Sunday, I wore the outfit I'm probably most proud of:


That beautiful green corset started life as a horrible 90's suit. My shirt was actually one of my husband's old dress shirts while the lace is all scrounged from the costume shop (jabots are great for using those scraps that can't work for anything else) Skirt and apron material were thrifted and found respectively.

I had enough leftover material from the suit to use the fabric in this fun bustle and turn the scraps into a hat.

I'm already thinking and planning what to do for the KY Renfaire's steampunk weekend... we'll see what I come up with!

Friday, March 2, 2012

Belated New Year's Steampunk

For New Year's - the husband and I went to spend the holidays with his family in North Carolina.  A great time was had by all but we were kindof at loose ends for New Year's Eve Plans.  Enter our old friends from college, all of whom were attending the Clockwork Ball at http://www.davenportandwinkleperry.com/ - an art gallery, coffee shop and bar that hosts gatherings of the steampunk community. 
Unfortunately, all our awesome steampunk costumes:
Were back home in Kentucky.  So what's a part-time costumer to do?

Well, she looks up all the local thrift stores and starts collecting pieces to put some costumes together.  Oh and she sends her husband off to make goggles :-)

So after three days of thrift shopping and re-working, we came up with the following costumes:


Made from three skirts, a jacket, some buttons and a bedsheet!

 Thrifted vest and pants, a hat that belonged to his dad and our new goggles!
His were strapped and ready to go, mine didn't get a strap in time for me to wear them to the ball :-(

We had a blast with our friends!


Now I'm looking at the Steampunk Empire Symposium that is happening in April.
And with warning  - I am planning to thrift us a pair of fun new outfits for this spectacular event (it's three days, we can wear our old stuff AND the new stuff!)

So starting Monday, here we go!